
LiftMaster Keypad Instruction Manual: A Comprehensive Guide
This manual provides detailed instructions for programming, resetting, and troubleshooting your LiftMaster keypad, ensuring secure and convenient garage door access. It covers various models!
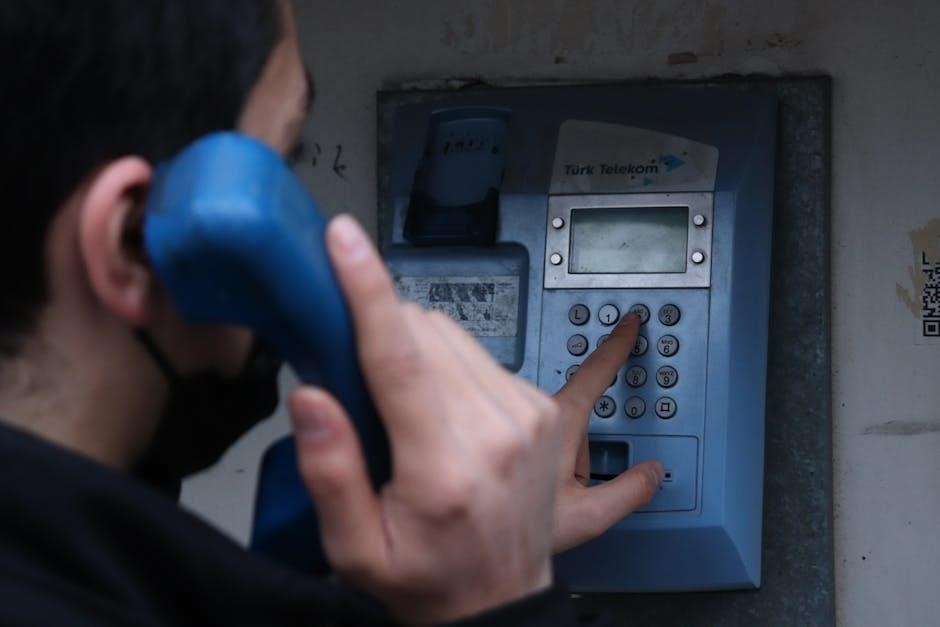
Understanding Your LiftMaster Keypad

Your LiftMaster keypad serves as a convenient, keyless entry system for your garage door, offering enhanced security and accessibility. These keypads typically feature a numeric entry pad, illuminated buttons for nighttime visibility, and a learn button for programming.
Compatible with Chamberlain and LiftMaster openers, the keypad allows authorized users to operate the door using a personal PIN code. Understanding the keypad’s functions, including the ‘Learn’ button’s role in syncing with the garage door opener, is crucial for successful operation. The keypad’s light indicates status – blinking signifies programming mode, while solid lights confirm operation.
Regularly checking the battery is also important for consistent performance.
Keypad Models and Compatibility
LiftMaster offers several keypad models, including the popular L979M, designed for compatibility with a wide range of Chamberlain and LiftMaster garage door openers. These keypads generally work with openers manufactured after 1993. However, compatibility can vary depending on the specific opener model and its frequency.
Keypads utilize rolling code technology, enhancing security by changing the access code each time it’s used. Before purchasing a new keypad, verify compatibility with your existing garage door opener. Checking the opener’s manual or LiftMaster’s website provides accurate information. Ensure the keypad supports the same frequency as your opener for seamless integration and reliable operation.
Older openers may require a compatibility adapter.
Safety Precautions Before Programming
Prior to programming your LiftMaster keypad, ensure the garage door is fully visible and free of obstructions. Never program the keypad while the door is in motion. Keep children and pets at a safe distance during the programming process to prevent accidental activation or injury.
Always test the keypad functionality after programming to confirm it operates correctly. Be mindful of your surroundings and ensure no one is in the path of the garage door. If you suspect any malfunction, immediately discontinue use and consult the troubleshooting section or contact LiftMaster support.
Regularly review and update your PIN code for enhanced security.

Programming a LiftMaster Keypad
Successfully programming your LiftMaster keypad involves locating the learn button, entering a PIN, and confirming operation – a straightforward process for convenient access!
Locating the Learn Button on Your Garage Door Opener
The “Learn” button is crucial for programming your LiftMaster keypad. Its location varies depending on your garage door opener model, but it’s typically found on the motor unit itself. Look for a small, colored button – often yellow, orange, purple, or red – usually near the antenna wire.
You might need a stepladder to safely reach the opener unit. The button is often on the back or side panel. Pressing and releasing this button activates a 30-second window for programming. The indicator light will begin to blink, signaling it’s ready to learn a new device, like your keypad. If you can’t find it, consult your garage door opener’s manual for specific instructions and diagrams.
Step-by-Step Programming Instructions (Standard Method)
Begin by pressing and releasing the “Learn” button on your garage door opener until the indicator light illuminates. Within the 30-second window, enter a four-digit PIN code on the keypad. After entering your desired PIN, press the “Enter” button twice. You should see the keypad light illuminate, confirming successful programming.
If successful, the garage door should respond to the entered PIN. If it doesn’t, repeat the process. Some models require entering an existing PIN first, then holding the “#” button before entering a new code. Remember to test the keypad thoroughly after programming to ensure reliable operation.
Using the PIN Code to Activate the Keypad
To operate your LiftMaster keypad, simply enter your programmed four-digit PIN code followed by pressing the “Enter” button. The garage door should then activate. Ensure you enter the code accurately, as multiple incorrect attempts may temporarily lock the keypad for security reasons.
Remember that the keypad is designed for convenient, keyless access. If you’ve recently programmed a new PIN, test it several times to confirm functionality. For added security, avoid using easily guessable PINs like birthdays or sequential numbers; The keypad offers a secure alternative to traditional keys, enhancing your home’s security.

Resetting Your LiftMaster Keypad
Resetting restores factory settings, useful when moving, forgetting the PIN, or suspecting unauthorized access. Follow specific steps based on PIN knowledge for a successful reset!
Reasons for Resetting the Keypad
There are several compelling reasons why you might need to reset your LiftMaster keypad. Perhaps the most common is when you’ve recently moved into a new home. You’ll want to change the existing PIN code to ensure your security and prevent unauthorized access to your garage.
Another frequent reason is simply forgetting your current PIN. A reset allows you to establish a new, memorable code. If you suspect someone has discovered your PIN, resetting immediately is crucial for maintaining the security of your property.
Furthermore, if the keypad is malfunctioning or behaving erratically, a reset can often resolve the issue by restoring it to its original factory settings. Finally, if you’re experiencing interference or signal problems, a reset can sometimes help re-establish a stable connection.
Resetting the Keypad When You Know the PIN
If you remember your existing PIN, resetting the keypad is a straightforward process. Begin by entering any programmed PIN code on the keypad itself. Then, simultaneously press and hold the # (pound) and * (asterisk) buttons. Continue holding these buttons until the keypad’s lights cease blinking – this indicates the reset process has begun.
Once the lights stop flashing, the keypad has been successfully reset to its factory defaults. You can then reprogram it with a new, four-digit PIN code of your choosing. Remember to test the new PIN code to confirm it functions correctly. This method is quick and efficient when you haven’t forgotten your current access code.
Resetting the Keypad When You’ve Forgotten the PIN
Forgetting your PIN requires a more involved reset, typically involving the garage door opener unit itself. Locate the “Learn” button on your garage door opener – it’s often near the antenna wire. Press and release this button; the indicator light should begin to blink. This puts the opener into programming mode.
Next, on the keypad, enter any random four-digit code, then press the “Enter” button twice. This action should initiate a reset. The keypad will then prompt you to enter a new PIN. Choose a memorable, yet secure, four-digit code and enter it, followed by pressing “Enter” again. Test the new PIN to ensure successful operation.

Troubleshooting Common Keypad Issues
Diagnose keypad problems quickly! Common issues include unresponsive keypads, incorrect PIN errors, and signal interference, all of which can be resolved with simple steps.
Keypad Not Responding
If your LiftMaster keypad isn’t responding, begin by checking the battery. A depleted battery is a frequent cause of this issue. Replace it with a fresh one to see if that resolves the problem. Next, ensure there isn’t physical damage to the keypad itself.
Also, verify the distance between the keypad and the garage door opener; excessive distance can weaken the signal. Try pressing the Learn button on the opener unit to re-establish the connection. If the indicator light doesn’t blink, the opener might have its own issues.
Confirm that the keypad is within range and that there are no significant obstructions interfering with the radio frequency signal. Sometimes, simply restarting the garage door opener can resolve temporary glitches. If problems persist, consult the full manual or contact LiftMaster support.
Incorrect PIN Error
Encountering an “Incorrect PIN” error on your LiftMaster keypad is a common frustration. First, double-check that you are entering the correct four-digit PIN code. Remember that PIN codes are case-sensitive, though keypads typically only use numbers. If you’ve recently changed the PIN, ensure you’re using the new code.
If you’ve forgotten the PIN, a keypad reset is necessary, but this process varies depending on whether you still know any valid PIN. Attempting multiple incorrect PIN entries may temporarily lock the keypad as a security measure. Wait a few minutes and try again.
Refer to the resetting instructions in this manual for guidance. If the error persists after several attempts and a reset, contact LiftMaster customer support for further assistance and potential troubleshooting steps.
Interference and Signal Issues
Signal interference can disrupt communication between your LiftMaster keypad and the garage door opener. Common sources include other wireless devices, fluorescent lights, and even certain types of building materials. Try relocating the keypad or opener slightly to minimize obstructions.
Ensure the keypad’s antenna wire is fully extended and not coiled. Check for any new electronic devices installed near the opener or keypad that might be causing interference. If problems persist, temporarily turn off nearby wireless devices to see if signal strength improves.
Low battery levels in the keypad can also weaken the signal. Replace the batteries with fresh ones. If interference continues, contact LiftMaster support for advanced troubleshooting.

Advanced Keypad Features

Explore enhanced security with temporary PIN codes, convenient keypad lighting options, and learn about essential battery replacement procedures for optimal performance.
Temporary PIN Codes
LiftMaster keypads offer a valuable security feature: the ability to create temporary PIN codes. This is incredibly useful for granting access to guests, service providers, or family members for a limited time without compromising your primary access code.
These temporary codes can be programmed to expire after a specific number of uses or after a predetermined date and time, adding an extra layer of control. The process typically involves entering a special sequence of buttons on the keypad itself, followed by setting the desired expiration parameters.
This eliminates the need to share your main PIN, which is crucial for maintaining the security of your home. Always remember to delete temporary codes once they are no longer needed to prevent unauthorized access. Refer to your specific model’s manual for detailed instructions on creating and managing temporary PINs.
Keypad Lighting and Battery Replacement
Maintaining your LiftMaster keypad’s functionality involves understanding its lighting features and knowing how to replace the batteries. Most keypads feature backlighting for improved visibility in low-light conditions, activated by pressing any button. If the lighting is dim or absent, it’s often a sign the batteries need replacing.
Typically, LiftMaster keypads use 9-volt batteries. The battery compartment is usually located on the back of the keypad, accessible by a small latch or screws. Replace the old battery with a fresh one, ensuring correct polarity. After replacement, you may need to reprogram the keypad.
Regular battery checks are recommended to avoid unexpected keypad failures. A flashing light or error message often indicates low battery levels, providing a timely warning.
Keypad Security Considerations
Protecting your garage’s security is paramount when using a LiftMaster keypad. Avoid using easily guessable PIN codes like birthdays or “1234”. Regularly changing your PIN code, especially after moving into a new home, is a crucial security measure. Be mindful of anyone observing you enter the code.
Consider utilizing the temporary PIN code feature for guests or service providers, granting limited access. If you suspect your PIN has been compromised, immediately reset the keypad to a new, secure code.
Be aware of potential interference that could allow unauthorized access. Keep the keypad area well-lit and consider its visibility from public areas. Prioritize a strong, unique PIN for optimal security.

Resources and Support
For further assistance, explore LiftMaster’s customer support, online manuals, and frequently asked questions. Warranty details and contact information are readily available online!
LiftMaster Customer Support Contact Information

Need direct assistance with your LiftMaster keypad? LiftMaster offers several avenues for support. You can reach their customer service team via phone at 1-800-344-4044. Their website, www.liftmaster.com, is a comprehensive resource, featuring a detailed support section with troubleshooting guides and downloadable manuals.
For specific inquiries or to locate a local dealer, utilize the “Contact Us” form on their website. Live chat support is also frequently available during business hours. When contacting support, have your keypad model number and garage door opener model number readily available to expedite the process. LiftMaster’s dedicated team is committed to providing prompt and effective solutions to ensure your keypad functions optimally and securely.
Online Manuals and FAQs
LiftMaster’s website provides a wealth of self-service resources. Access a comprehensive library of online manuals for various keypad models, offering detailed programming instructions, safety guidelines, and troubleshooting tips. The frequently asked questions (FAQs) section addresses common user concerns, providing quick solutions to everyday issues.
You can easily search for specific topics or browse by product category. www.liftmaster.com also features helpful videos demonstrating keypad programming and reset procedures. These visual guides can be particularly useful for those who prefer a step-by-step approach. Utilizing these online resources can often resolve issues quickly and efficiently, without the need to contact customer support directly.
Warranty Information
LiftMaster keypads are backed by a limited warranty, protecting against defects in materials and workmanship. The standard warranty period typically covers one year from the date of purchase, though extended warranties may be available. This warranty covers replacement or repair of the keypad, at LiftMaster’s discretion.
To make a warranty claim, you’ll generally need to provide proof of purchase and a description of the defect. The warranty does not cover damage caused by misuse, improper installation, or unauthorized modifications. Visit LiftMaster’s website for complete warranty details and claim procedures. Retain your purchase receipt to ensure a smooth warranty process.