Brother LS-2125 Sewing Machine Manual: A Comprehensive Guide
This detailed manual expertly guides users through every aspect of the Brother LS-2125‚ from initial setup to advanced techniques‚ ensuring a seamless sewing experience.
Welcome to the world of sewing with the Brother LS-2125! This user-friendly sewing machine is designed for both beginners and experienced sewists‚ offering a blend of simplicity and functionality. The LS-2125 is a mechanical‚ zig-zag sewing machine known for its reliability and ease of use.
This manual serves as your comprehensive guide‚ providing step-by-step instructions and helpful illustrations to ensure you get the most out of your machine. We’ll cover everything from initial setup – unboxing‚ threading‚ and bobbin winding – to mastering basic and advanced sewing techniques.
Whether you’re embarking on your first sewing project or looking to refine your skills‚ this manual will empower you to create beautiful and professional-looking results. Get ready to unleash your creativity!
Key Features and Specifications
The Brother LS-2125 boasts a range of features designed for convenience and versatility. It offers 15 built-in stitch patterns‚ including straight stitch‚ zigzag stitch‚ and buttonhole stitch‚ catering to diverse sewing needs. The machine features adjustable stitch length and width‚ allowing for customization based on fabric and project requirements.
Key specifications include: a mechanical feed system‚ a maximum sewing speed of 750 stitches per minute‚ and the ability to handle various fabric types‚ from lightweight to medium-weight materials. It utilizes a vertical spool pin and a drop-in bobbin system for easy setup and operation.
Furthermore‚ the LS-2125 is designed with a free arm for sewing cuffs‚ sleeves‚ and other cylindrical shapes. Its compact and lightweight design makes it easy to store and transport. This machine is a reliable workhorse for all your sewing endeavors.
Setting Up Your Sewing Machine
Prepare for creative projects! This section details the essential steps to quickly and safely prepare your Brother LS-2125 for its first stitch.
Unboxing and Initial Inspection
Carefully unpack your new Brother LS-2125 sewing machine‚ ensuring all components are present. Begin by removing the machine from its packaging‚ retaining the box and packing materials for potential future transport or storage. Inspect the machine thoroughly for any visible signs of damage incurred during shipping – dents‚ scratches‚ or broken parts.
Verify the contents against the included parts list. You should find the sewing machine itself‚ a foot pedal‚ a power cord‚ a set of needles‚ bobbins‚ various presser feet (standard‚ buttonhole‚ zipper‚ etc.)‚ a screwdriver‚ a seam ripper‚ and this comprehensive manual. Check each accessory for completeness and condition.
If any items are missing or damaged‚ immediately contact the retailer or Brother customer support for assistance. Do not attempt to operate the machine if parts are missing or damaged‚ as this could lead to malfunction or injury. Document any issues with photographs and retain all packaging materials as proof of damage.
Attaching the Power Cord and Foot Pedal
Before connecting the power‚ ensure the machine’s power switch is in the “OFF” position. Locate the power cord socket on the back of the Brother LS-2125. Insert the power cord firmly into the socket‚ ensuring a secure connection. Then‚ plug the other end of the power cord into a grounded electrical outlet.
Next‚ connect the foot pedal. Find the designated foot pedal socket‚ typically located on the front or side of the machine. Insert the foot pedal plug into the socket‚ again ensuring a snug fit. The foot pedal controls the sewing speed; pressing it regulates the stitching.
Test the connection by turning the machine on. The power light should illuminate. Gently press the foot pedal to verify that the machine responds and the needle begins to move. If the machine doesn’t power on‚ double-check both connections and the outlet.
Winding the Bobbin
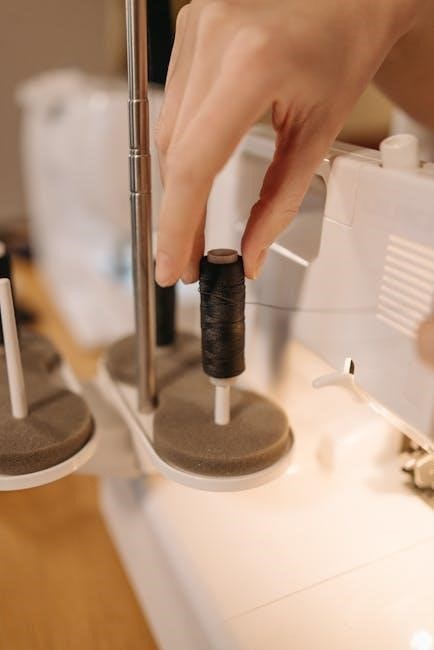
Begin by placing the thread spool onto the spool pin. Secure it with the spool cap to prevent unraveling. Next‚ guide the thread through the thread guide‚ following the numbered path indicated on the machine. Ensure the thread is properly seated in the tension disc for even winding.
Place the empty bobbin onto the bobbin winder spindle. Push the spindle to the right to engage the winding mechanism. Hold the thread tail and gently press the foot pedal. The bobbin will begin to wind.

Allow the bobbin to wind evenly‚ stopping when it’s nearly full. Disengage the bobbin winder by pushing the spindle back to the left. Cut the thread and remove the full bobbin. Properly wound bobbins are crucial for consistent stitch quality.
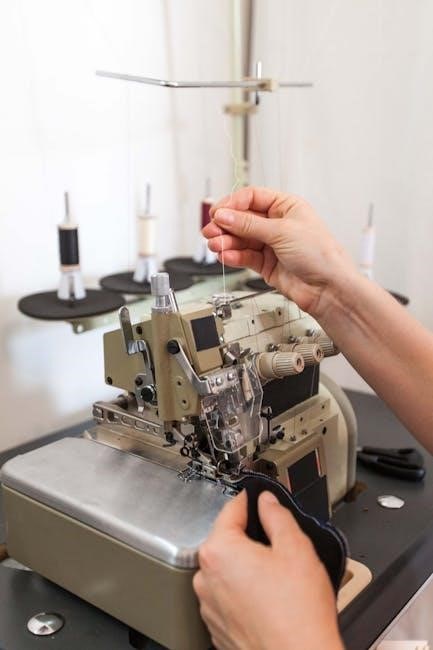
Threading the Upper Thread
Start by ensuring the presser foot is raised and the needle is in its highest position. This opens the tension discs‚ allowing the thread to seat correctly. Place the spool of thread on the spool pin and secure it with the spool cap.
Guide the thread through the first thread guide‚ then down and around the tension discs. Continue following the numbered path indicated on the machine‚ ensuring the thread snaps into each guide. Next‚ thread the take-up lever from front to back.
Finally‚ thread the needle from front to back. A needle threader can be helpful for this step. Pull several inches of thread through the needle. Proper threading is essential for smooth‚ consistent stitching. Double-check each step to avoid skipped stitches.
Threading the Bobbin Thread
After winding a full bobbin‚ locate the bobbin case underneath the needle plate. Gently pull the bobbin case latch open. Insert the bobbin into the bobbin case‚ ensuring the thread unwinds in the correct direction – typically counter-clockwise.
Guide the thread through the tension spring on the bobbin case. You should feel a slight resistance as the thread seats properly. Then‚ carefully re-insert the bobbin case into its compartment‚ closing the latch securely.
Hold the upper thread loosely in your left hand. Lower the needle completely‚ then gently lift the needle to bring up a loop of upper thread. Use a bobbin hook or your fingers to pull the bobbin thread up through the needle plate‚ creating a loop. Draw both threads towards the back of the machine‚ under the presser foot‚ to begin sewing.
Basic Sewing Operations
Mastering fundamental techniques is key to unlocking the Brother LS-2125’s potential‚ enabling you to confidently tackle a wide range of sewing projects with ease.
Selecting Stitch Patterns
The Brother LS-2125 offers a versatile selection of stitch patterns‚ catering to diverse sewing needs. To choose a stitch‚ locate the stitch selection dial‚ typically positioned on the front of the machine. This dial features a chart illustrating available stitches – straight stitch‚ zigzag stitch‚ and various decorative options.
Carefully rotate the dial until the desired stitch number aligns with the indicator mark. Ensure the machine is turned off during stitch selection to prevent accidental changes. For basic seams‚ the straight stitch is ideal‚ while the zigzag stitch excels in finishing raw edges and creating stretchable seams.
Experiment with the decorative stitches to add unique embellishments to your projects. Refer to the stitch chart in your manual for specific applications of each pattern. Remember to test each stitch on a scrap fabric before commencing your actual project to ensure optimal results and adjust settings as needed.
Adjusting Stitch Length and Width
Precise control over stitch length and width is crucial for achieving professional-looking results with your Brother LS-2125. The stitch length dial‚ usually located near the stitch selection dial‚ allows you to modify the distance between stitches. A shorter stitch length is ideal for delicate fabrics and intricate details‚ while a longer length suits heavier materials and quicker sewing.
The stitch width dial controls the breadth of zigzag stitches and decorative patterns. Increasing the width creates a wider zigzag‚ useful for securing edges and creating decorative effects. For straight stitches‚ the width dial should be set to zero.
Always test your chosen settings on a scrap fabric before sewing your project. Observe how the stitch appears and adjust the dials accordingly. Gradual adjustments are recommended for optimal results‚ ensuring the stitches are even and secure without puckering the fabric.
Sewing Straight Stitches
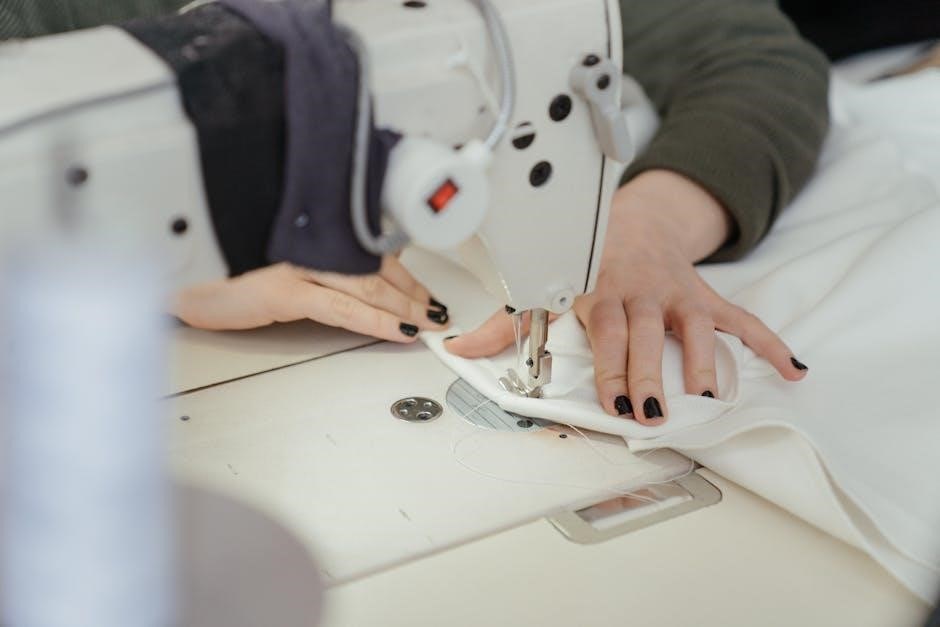
Mastering straight stitches is fundamental to sewing‚ and the Brother LS-2125 makes this process straightforward. Begin by selecting the straight stitch pattern on the stitch selection dial. Ensure your fabric is positioned correctly under the presser foot‚ aligning the edge with the desired seam allowance guide on the needle plate.
Gently lower the presser foot to secure the fabric. Depress the foot pedal slowly and steadily to begin sewing. Guide the fabric gently; avoid pulling or pushing it‚ allowing the machine to feed it evenly. Maintain a consistent speed for a uniform stitch line.
For accurate seams‚ use the markings on the needle plate as a guide. Practice maintaining a consistent distance from the edge of the fabric. Regularly check the stitch formation on the underside of the fabric to ensure proper tension and even stitching.
Sewing Zigzag Stitches
Zigzag stitches offer versatility for various applications‚ from finishing raw edges to creating decorative effects. Select the zigzag stitch pattern using the stitch selection dial on your Brother LS-2125. Adjust the stitch width using the dedicated width control; wider settings create broader zigzags.
Experiment with stitch length using the length control. Shorter stitches are ideal for delicate fabrics or tight curves‚ while longer stitches are suitable for heavier materials or stretch fabrics. Lower the presser foot and gently guide the fabric‚ maintaining a consistent speed.
Zigzag stitches are excellent for preventing fabric fraying. Sew along the raw edge of the fabric‚ ensuring the zigzag stitch fully encompasses the edge. Practice on scrap fabric to achieve the desired stitch appearance and secure finish.
Reverse Sewing
Reverse sewing‚ often used for securing seams at the beginning and end‚ is easily achieved on the Brother LS-2125. Locate the reverse lever or button – typically positioned near the handwheel. Depress this lever or button to engage reverse stitching.
Begin your seam by sewing forward for a short distance‚ then activate the reverse function. Sew backwards over the initial stitches for approximately half an inch to secure the seam. Release the reverse lever and continue sewing forward.
Repeat this process at the end of your seam. Sew forward‚ then reverse back over the last half inch of stitching. This creates a strong‚ locked stitch‚ preventing unraveling. Practice on scrap fabric to become comfortable with the reverse function and ensure consistent results;
Advanced Features & Techniques
Unlock your machine’s potential with buttonholes‚ adjustable presser feet‚ free-motion quilting‚ and customized stitch settings for diverse projects and creative expression.
Using the Buttonhole Function
The Brother LS-2125’s buttonhole function offers a convenient way to create professional-looking buttonholes quickly and consistently. Begin by attaching the buttonhole foot to your machine. Select the appropriate buttonhole stitch setting – typically a designated buttonhole pattern on the stitch selector dial.
Place your button at the back of the buttonhole opening on the buttonhole foot. Lower the presser foot and gently begin sewing. The machine will automatically stitch the buttonhole outline‚ stopping at each corner.
Follow the markings on the buttonhole foot as a guide for button placement. After completing the buttonhole‚ carefully remove the fabric. Practice on scrap fabric first to ensure proper buttonhole size and tension. Adjust the buttonhole width settings if needed to accommodate different button sizes. Regularly check your manual for specific buttonhole foot and stitch setting details.
Adjusting Presser Foot Pressure
Proper presser foot pressure is crucial for achieving optimal stitch quality on various fabric types; The Brother LS-2125 allows you to adjust this pressure to prevent issues like puckering‚ skipped stitches‚ or fabric feed problems. Locate the presser foot pressure dial‚ usually found on the side or back of the machine.
For lightweight fabrics‚ reduce the pressure to prevent puckering and allow the fabric to feed smoothly. Conversely‚ increase the pressure for heavier fabrics like denim or canvas to ensure adequate grip and consistent stitch formation.
Always test the adjusted pressure on a scrap of the fabric you intend to use. Observe the stitch quality and adjust accordingly. A balanced pressure ensures even fabric feeding and prevents thread breakage. Refer to your machine’s manual for specific pressure settings recommended for different materials.
Using Optional Presser Feet
Expanding the capabilities of your Brother LS-2125 is easily achieved with a range of optional presser feet. These specialized feet unlock new sewing possibilities beyond standard stitching. Common options include a zipper foot for precise zipper insertion‚ a buttonhole foot for perfectly shaped buttonholes‚ and a blind hem foot for invisible hems.
A gathering foot creates ruffled fabric‚ while a quilting foot aids in even stitch distribution for quilting projects. Installing a new presser foot is straightforward: release the retaining screw on the current foot and gently snap the new foot into place.
Ensure the foot is securely attached before beginning to sew. Consult your machine’s manual or the presser foot’s instructions for specific usage guidelines and recommended settings. Utilizing the correct foot dramatically improves project outcomes.
Free Motion Quilting
Unleash your creativity with free motion quilting on the Brother LS-2125. This technique allows for drawing designs directly onto fabric‚ creating unique and personalized quilts. First‚ lower the feed dogs – this disengages the machine’s automatic fabric feeding. Attach a darning foot‚ designed for unrestricted movement.
Set the stitch length to zero and gently lower the presser foot. Begin slowly‚ guiding the fabric with both hands‚ creating stitches as you move. Practice consistent speed and pressure for even results.
Experiment with different thread colors and patterns. Remember‚ free motion quilting requires practice; start with simple designs and gradually increase complexity. A quilting glove can improve grip and control. Enjoy the artistic freedom!

Maintenance and Troubleshooting
Regular upkeep ensures optimal performance. This section details cleaning‚ oiling‚ and solutions to common issues‚ keeping your Brother LS-2125 running smoothly for years.
Cleaning the Sewing Machine
Maintaining a clean sewing machine is crucial for its longevity and performance. Dust‚ lint‚ and thread fragments can accumulate within the machine‚ causing malfunctions and affecting stitch quality. Regular cleaning‚ ideally after every use or at least monthly with frequent sewing‚ prevents these issues.
Begin by disconnecting the power cord for safety. Use a soft brush – the brush included with your Brother LS-2125 is perfect – to gently remove lint from the bobbin area‚ feed dogs‚ and around the needle plate. A small vacuum cleaner with a brush attachment can also be helpful‚ but use it cautiously to avoid damaging delicate parts.
For stubborn lint‚ a cotton swab lightly dampened with sewing machine oil can be used. Avoid using compressed air‚ as it can push debris further into the machine. Wipe down the exterior surfaces with a soft‚ damp cloth. Never use harsh chemicals or abrasive cleaners‚ as these can damage the finish. Remember to clean under the needle plate‚ accessing it as described in your manual for safe removal and reinstallation.
Oiling the Sewing Machine
Proper lubrication ensures smooth operation and prevents wear and tear on your Brother LS-2125. Regular oiling‚ typically every few months with moderate use‚ is essential. Always use sewing machine oil specifically designed for this purpose; other oils can gum up the mechanism.
Before oiling‚ disconnect the power cord. Locate the oiling points as indicated in your manual – these generally include the bobbin race‚ hook assembly‚ and any areas where metal parts move against each other. Apply a small drop of oil to each point‚ using the oiler included with your machine.
Avoid over-oiling‚ as excess oil can attract lint and create a mess. After oiling‚ manually turn the handwheel several times to distribute the oil evenly. Wipe away any excess oil with a clean cloth. Caution: Do not oil the shuttle hook if it is a self-oiling type‚ as this can disrupt its lubrication system. Consistent oiling extends the life of your machine.
Troubleshooting Common Problems
Encountering issues with your Brother LS-2125 is common‚ but many are easily resolved. Thread bunching often indicates incorrect threading or improper tension. Re-thread both the upper and bobbin threads‚ ensuring they are seated correctly. Skipped stitches can stem from a dull or incorrectly inserted needle; replace it with a new‚ appropriate needle.
If the machine jams‚ stop immediately and carefully remove the fabric and tangled threads. Never force anything. Uneven stitching may point to inconsistent fabric feeding; check the presser foot pressure and ensure the fabric is guided smoothly. Bobbin issues‚ like thread shredding‚ often require cleaning the bobbin case and re-winding the bobbin correctly.
Consult the manual’s troubleshooting section for specific error codes or detailed solutions. Remember to always disconnect the power before attempting any repairs. If problems persist‚ seek assistance from a qualified sewing machine technician.
Replacing the Needle
A dull or damaged needle significantly impacts stitch quality. To replace the needle on your Brother LS-2125‚ first‚ ensure the machine is off. Loosen the needle clamp screw using the screwdriver included with your machine. Gently pull the old needle upwards.
Insert the new needle with the flat side facing the back of the machine. Push it up as far as it will go. Tighten the needle clamp screw securely‚ but avoid over-tightening. Always use the correct needle type and size for your fabric. Universal needles work for most fabrics‚ while ballpoint needles are best for knits.
Regular needle replacement – approximately every 6-8 hours of sewing – prevents skipped stitches and fabric damage. Dispose of used needles safely in a designated container to avoid injury. Refer to your manual for specific needle recommendations and diagrams.
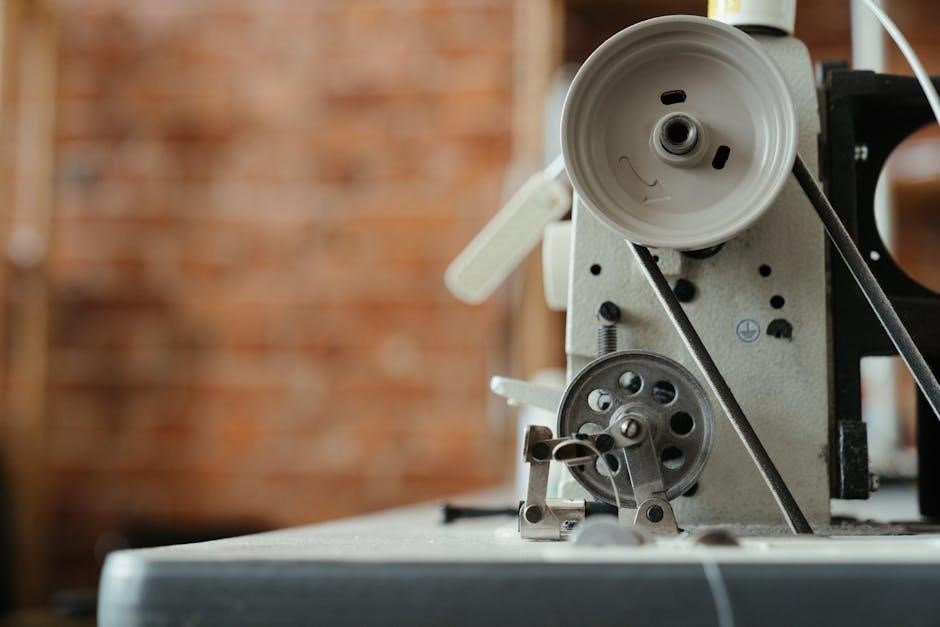
Belt Replacement
A broken or worn belt will prevent your Brother LS-2125 from operating. Replacing it requires some disassembly. First‚ disconnect the power cord. Remove the access panel on the rear of the machine‚ typically secured with screws. Carefully note the belt’s routing before removal – a photograph can be helpful!
Gently remove the old belt from the motor pulley and the handwheel. Install the new belt‚ ensuring it’s seated correctly on both pulleys. The belt should have proper tension; not too tight‚ not too loose. Reattach the access panel‚ securing it with the screws.
Test the machine by turning the handwheel. If it rotates smoothly‚ the belt is installed correctly. If you’re uncomfortable with this process‚ consult a qualified sewing machine technician. Always use a genuine Brother replacement belt for optimal performance.
Safety Precautions
Always prioritize safety when operating your Brother LS-2125. Follow electrical guidelines and general safety rules to prevent injury and ensure long-lasting use.
Electrical Safety Guidelines
To ensure safe operation of your Brother LS-2125 sewing machine‚ adhere to these crucial electrical safety guidelines. Always verify the power cord is undamaged before each use‚ and never operate the machine with a frayed or exposed wire. Ensure the voltage indicated on the machine matches your household supply.
Avoid using extension cords unless absolutely necessary‚ and if used‚ select one rated to handle the machine’s amperage. Never immerse the machine‚ power cord‚ or foot pedal in water or any other liquid. Disconnect the machine from the power outlet when not in use‚ before cleaning‚ or when changing parts like the needle.
Do not attempt to repair the machine yourself if you suspect an electrical fault; instead‚ contact a qualified technician. Keep the machine away from flammable materials and ensure proper grounding to prevent electric shock. Regularly inspect the plug for damage and replace if needed. Prioritizing these precautions will safeguard both you and your sewing machine.
General Safety Rules
Prioritize safety when operating your Brother LS-2125 sewing machine. Always keep fingers away from moving parts‚ particularly the needle‚ presser foot‚ and rotating hook. Never sew over pins or thick materials that could damage the needle. Use the correct needle type and size for the fabric being sewn to prevent breakage and potential injury.
Exercise caution when handling sharp objects like scissors and seam rippers. Disconnect the machine from power before changing the needle‚ threading‚ or performing any maintenance. Supervise children closely when the machine is in use‚ and never allow them to operate it unsupervised.
Avoid wearing loose clothing or jewelry that could get caught in the machine. Maintain a clean and well-lit workspace to prevent accidents. If the machine malfunctions‚ stop using it immediately and consult the troubleshooting section of this manual or contact a qualified technician. Following these rules ensures a safe and enjoyable sewing experience.