
Ear Piercing Size Guide: A Comprehensive Overview (Updated 12/18/2025)
Navigating the world of ear piercings requires understanding gauge and length! This guide, updated today, 12/18/2025, details standard sizes, stretching options, and material impacts for optimal healing and style.
Understanding Piercing Gauges
Piercing gauges represent the thickness of the jewelry, and understanding them is fundamental to a comfortable and well-healed piercing. Unlike common measurements, gauges operate on a reverse numerical system – a lower gauge number indicates a thicker piece of jewelry. This can be initially counterintuitive, but it’s crucial to grasp for both initial piercings and any future stretching endeavors.
Standard ear piercings typically fall between 20G and 16G, with 20G being the thinnest commonly used for initial lobe piercings. As you increase the gauge number, the jewelry becomes thinner. Beyond standard lobe piercings, gauges extend significantly, reaching sizes like 14G, 12G, 10G, and even larger, often associated with intentional stretching. Jewelry sizing ranges from 22G to 00G, transitioning to inches or millimeters for larger gauges.
Choosing the correct gauge is vital for preventing irritation, promoting healing, and ensuring a comfortable fit. Improperly sized jewelry can lead to migration, rejection, or even infection. Therefore, consulting a professional piercer is always recommended.
What is Gauge? The Basics
“Gauge” refers to the diameter of a piercing, specifically the thickness of the jewelry that fits within it. It’s a system historically used for wire, adapted for body jewelry. The gauge number indicates how many times the wire of that diameter could be drawn through a specific die – hence, a higher number means a thinner wire (and jewelry). This is where the confusion arises; smaller numbers equal thicker jewelry!
Measurements are typically expressed in gauges (G), but also in millimeters (mm). For example, a 20G piercing is equivalent to 0.8mm in diameter. Understanding both systems is helpful, as some piercers may use metric measurements. Common gauges for ear piercings range from 24G (very fine, often for initial lobe piercings) to 0G (quite large, typically for stretched lobes).
It’s essential to remember that gauge relates to the internal diameter of a ring or the thickness of a post. Accurate gauge selection is paramount for comfort, proper healing, and preventing complications.
The Counterintuitive Nature of Gauge Numbers
The world of piercing gauges operates on a seemingly backward logic. Unlike many measurement systems where a higher number signifies a larger size, with gauges, the opposite is true. A lower gauge number indicates a thicker piece of jewelry, while a higher number denotes a thinner one. This can be incredibly confusing for newcomers to body modification!
Think of it this way: a 14G earring is significantly thicker than a 20G earring. The smaller the number, the larger the diameter of the jewelry. This stems from the historical origins of the gauge system, relating to the manufacturing of wire. The more times a wire could be drawn through a die, the thinner it became, and the higher the gauge number.
Don’t let this reverse system intimidate you. Remembering this key principle – lower gauge = thicker jewelry – will prevent misunderstandings when discussing sizing with your piercer. It’s a quirk of the system, but easily mastered with a little practice!
Standard Ear Piercing Gauges
When getting your ears initially pierced, or selecting jewelry for existing piercings, understanding standard gauges is crucial. The most commonly used gauges for earlobes fall within a relatively narrow range, ensuring comfort and proper healing. Typically, initial lobe piercings are done with 20G (0.8mm), 18G (1;0mm), or 16G (1.2mm) jewelry.
The 20G is the thinnest and often preferred for the initial piercing due to its ease of insertion and minimal trauma. However, 18G and 16G are also widely accepted and offer slightly more durability. For cartilage piercings, like helixes or conches, 18G and 16G are the most prevalent choices, providing sufficient strength to withstand daily wear.
These standard gauges allow for versatility in jewelry selection, with a vast array of styles available. Remember, choosing the right gauge is essential for a comfortable fit and successful healing process. Always consult with a professional piercer to determine the most appropriate gauge for your anatomy and desired aesthetic.
24 Gauge (0.6mm): Common Uses
The 24 gauge, measuring 0.6mm in diameter, represents a very thin piercing option, primarily utilized for specific applications rather than standard earlobe piercings. It’s frequently employed for delicate nose piercings, particularly for initial nostril piercings and subtle nose studs. Due to its fineness, it offers a more discreet appearance, ideal for those preferring a minimalist aesthetic.
While less common for initial earlobe piercings, a 24G can sometimes be used for surface piercings or smaller cartilage adornments where a delicate look is desired. However, its thinness means it’s generally not recommended for areas prone to significant movement or stress. The jewelry material plays a crucial role with this gauge; high-quality, hypoallergenic options are essential to minimize irritation.
Healing times with 24G piercings can be longer due to the smaller size and potential for migration. Careful aftercare and consistent cleaning are paramount. It’s vital to consult a professional piercer to assess suitability and ensure proper placement and jewelry selection.
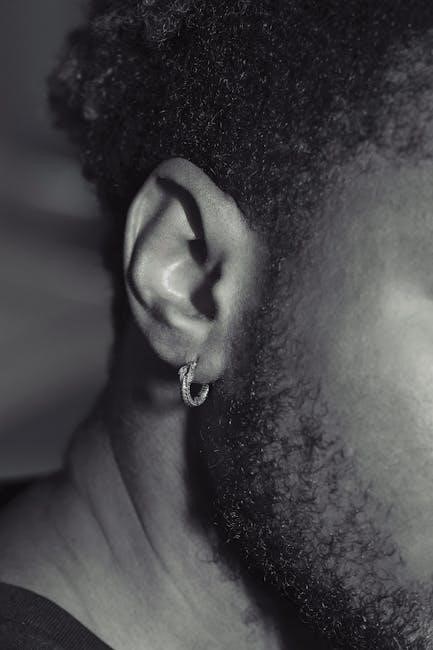
20 Gauge (0.8mm): Initial Piercings & Nose Studs
The 20 gauge, with a diameter of 0.8mm, is a very popular choice for initial earlobe piercings and a frequent selection for nose piercings. Many individuals begin their piercing journey with this thickness, as it provides a balance between being substantial enough for easy insertion and comfortable wear, yet still allowing for relatively quick healing. It’s a versatile gauge suitable for a wide range of jewelry styles.
For nose studs and small nose rings, the 20G is a standard offering, providing a delicate yet noticeable accent. It’s also commonly used for cartilage piercings, though a piercer will assess individual anatomy to determine the most appropriate gauge. The initial piercing with a 20G post gauge is often preferred for its ease of care.
When choosing jewelry for a 20G piercing, opting for hypoallergenic materials like surgical steel, titanium, or gold is crucial to minimize allergic reactions and promote healthy healing. Consistent aftercare, including regular cleaning, is essential for a successful outcome.
18 Gauge (1.0mm): Versatility in Ear Piercings

The 18 gauge, measuring 1.0mm in diameter, offers increased versatility compared to the 20G, becoming a favored choice for a broader spectrum of ear piercings. It’s frequently selected for initial cartilage piercings, including helixes and conches, providing a slightly more robust feel while still being comfortable for daily wear. This gauge strikes a good balance for those wanting a noticeable yet not overly large piercing.
Beyond initial piercings, the 18G is well-suited for add-ons, particularly in the lobe or cartilage. It accommodates a wider variety of jewelry styles, including rings, studs, and decorative charms. It’s also a common size for nose studs and rings, offering a slightly bolder look than the 20G.
When considering an 18G, material selection remains paramount. High-quality materials like implant-grade titanium or surgical steel are recommended to minimize irritation and support healthy tissue development. Proper aftercare, including gentle cleaning and avoiding unnecessary manipulation, is vital for optimal healing.
16 Gauge (1.2mm): Popular for Standard Lobes
The 16 gauge, with a diameter of 1.2mm, is exceptionally popular, particularly for standard earlobe piercings. It’s often the go-to size for first-time lobe piercings due to its comfortable fit and ability to accommodate a wide range of jewelry styles. Many individuals find it provides a secure yet not overly bulky feel, making it ideal for everyday wear.
This gauge is also frequently used for cartilage piercings, offering a slightly more substantial presence than the 18G. It’s a versatile option for helixes, daiths, and traguses, allowing for diverse jewelry choices like captive bead rings, barbells, and decorative studs. The 16G provides a good foundation if future stretching is considered.
Selecting appropriate jewelry material is crucial with a 16G piercing. Implant-grade titanium or surgical steel are highly recommended to minimize allergic reactions and promote healthy healing. Consistent aftercare, including regular cleaning with a saline solution, is essential for preventing infection and ensuring a smooth recovery process.
14 Gauge (1.6mm): Stretching & Statement Pieces
Stepping up to 14 gauge (1.6mm) signifies a noticeable increase in piercing size, often marking the beginning of intentional stretching for those desiring larger gauge piercings. This size is a popular choice for individuals wanting to make a bolder statement with their ear adornments, accommodating more substantial jewelry options.
At 14G, jewelry choices expand to include thicker hoops, larger gauge barbells, and more elaborate designs. It’s a common size for stretched lobes and can be used in cartilage piercings, though careful consideration should be given to the piercing’s location and healing stage. Gradual stretching is paramount; attempting to jump gauges too quickly can cause tearing and scarring.
When stretching, high-quality materials like implant-grade titanium or glass are preferred. Consistent lubrication with a stretching balm and diligent aftercare are vital to minimize discomfort and promote healthy tissue expansion. Remember, patience is key – stretching is a process, not a race!
12 Gauge (2.0mm): Further Stretching Options
Reaching 12 gauge (2.0mm) represents continued commitment to stretching, opening up even more diverse jewelry possibilities. This size is favored by those seeking a significantly larger aesthetic in their ear piercings, allowing for substantial and eye-catching adornments. It’s a point where the visual impact of the gauge becomes quite prominent.
At 12G, jewelry options include larger-diameter hoops, heavier gauge barbells, and more intricate designs. However, it’s crucial to maintain a slow and steady stretching pace. Rushing the process at this stage increases the risk of blowouts, scarring, and migration. Consistent down-sizing during healing periods is also recommended.
Prioritize biocompatible materials like glass or implant-grade titanium to minimize irritation and promote healthy tissue growth. Regular lubrication with a dedicated stretching balm and meticulous aftercare are non-negotiable. Remember, listening to your body and respecting its limits is essential for a successful stretching journey.
10 Gauge (2.4mm) & Beyond: Larger Gauge Piercings
Venturing into 10 gauge (2.4mm) and larger signifies a dedication to substantial ear modifications. These larger gauges are for individuals desiring a bold, statement look, moving beyond conventional piercing aesthetics. Beyond 10G, measurements often transition to fractions of an inch (like 00G, 2G, etc.) or millimeters, reflecting the significant size increase.
Stretching to these sizes demands extreme patience and meticulous care. The risk of complications – blowouts, migration, and tearing – escalates dramatically. Consistent down-sizing is paramount, even more so than at smaller gauges, to maintain the integrity of the piercing channel. Lubrication with high-quality stretching balms is absolutely essential.
Implant-grade materials like glass, titanium, or even stone are highly recommended to minimize irritation and support healthy tissue. Professional guidance is strongly advised, and self-stretching beyond 8G is generally discouraged. Remember, larger gauges are a long-term commitment requiring diligent aftercare and a deep understanding of the stretching process.
Ear Piercing Length Guide
Determining the correct length for your ear piercing jewelry is as crucial as selecting the appropriate gauge. Length impacts comfort, healing, and the overall aesthetic of the piercing. Standard lengths are measured in millimeters (mm), and vary significantly depending on the piercing location.
For initial lobe piercings, 6mm to 8mm posts are typical, allowing room for swelling during healing. Helix piercings generally require 6mm to 8mm lengths, while forward helix and conch piercings often need 6mm to 10mm to accommodate the curvature of the cartilage. Tragus and daith piercings usually necessitate shorter lengths, around 6mm to 7mm.
Industrial piercings demand careful measurement, often requiring 30mm to 40mm bars to span the distance between the two piercings. Always consult a professional piercer for accurate measurements, as individual anatomy varies. Incorrect length can lead to irritation, migration, or even rejection of the jewelry.

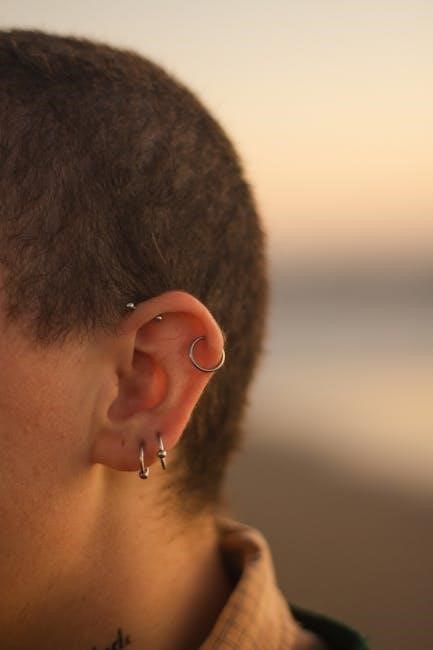
Helix Piercing Size Recommendations
The helix piercing, adorning the outer cartilage of the upper ear, is a popular choice, but proper sizing is vital for comfortable healing and a secure fit. Generally, a 6mm or 8mm labret stud is recommended for initial helix piercings. This length provides adequate space for potential swelling during the healing process, minimizing pressure and irritation;
However, individual ear anatomy varies considerably. Some individuals may require a 7mm or 9mm length for optimal comfort. It’s crucial to avoid jewelry that is too short, as it can dig into the cartilage, or too long, creating a snag hazard.
Gauge selection typically falls between 16G (1.2mm) and 18G (1.0mm) for initial helix piercings. A reputable piercer will assess your cartilage thickness and recommend the most appropriate gauge and length. Post-healing, you can explore different lengths and styles, but always prioritize comfort and secure retention.
Forward Helix & Conch Piercing Lengths
Sizing for forward helix and conch piercings demands careful consideration due to their unique locations and cartilage structures. Forward helix piercings, situated on the front cartilage fold, typically require jewelry lengths between 6mm and 8mm. The curvature of the ear necessitates a length that allows for comfortable movement without excessive pressure.
Conch piercings, nestled within the inner ear bowl, present different length requirements. Inner conch piercings generally need 6mm to 8mm jewelry, while outer conch piercings may accommodate slightly longer lengths, around 8mm to 10mm. The depth of the conch dictates the ideal length; too short can cause irritation, while too long can be uncomfortable.
Gauge choices for both typically range from 16G (1.2mm) to 18G (1.0mm). A professional piercer will accurately measure and recommend the best fit, accounting for individual anatomy and swelling potential. Prioritize a secure fit that minimizes movement and promotes healthy healing.
Tragus & Daith Piercing Sizes
Tragus and daith piercings, located within the inner ear cartilage, require precise sizing for comfort and proper healing. Tragus piercings, positioned on the small flap guarding the ear canal, generally utilize jewelry lengths between 6mm and 8mm. Due to the limited space, shorter lengths are often preferred to avoid irritation.
Daith piercings, nestled within the innermost cartilage fold above the ear canal, typically require jewelry lengths ranging from 7mm to 10mm. The curvature of the daith necessitates a length that accommodates movement without excessive pressure or snagging. A curved barbell is a common choice for this piercing.
Gauge recommendations for both piercings usually fall between 16G (1.2mm) and 18G (1.0mm). A skilled piercer will assess your anatomy and recommend the optimal size. Ensuring a comfortable fit is crucial, allowing for natural movement and minimizing the risk of migration or rejection.
Industrial Piercing Length Considerations
The industrial piercing, a striking connection between two cartilage piercings, demands careful length consideration for successful healing and long-term comfort. Unlike single piercings, the industrial’s length must accommodate the distance between the entry and exit points, varying significantly based on individual ear anatomy.

Generally, industrial jewelry lengths range from 32mm to 40mm, but precise measurement by a professional piercer is paramount. Too short, and the piercing will experience constant tension, hindering healing and potentially causing migration. Too long, and it risks snagging or being visibly awkward.
Gauge is typically 14G (1.6mm) to ensure sufficient strength and stability for the double connection. A straight barbell is the standard jewelry choice; Post-piercing, downsizing may be recommended to optimize fit and reduce irritation. Regular check-ups with your piercer are vital to monitor healing and adjust the jewelry if needed.
Rook & Septum Piercing Sizes
Rook and septum piercings, while distinct in location, share a common need for precise sizing to ensure comfort and proper healing. The rook, nestled within the inner cartilage, typically requires a curved barbell ranging from 6mm to 8mm in length. Individual ear anatomy dictates the ideal size; a skilled piercer will accurately measure the distance.
Gauge for rook piercings is generally 14G (1.6mm) or 16G (1.2mm), depending on the piercer’s preference and cartilage thickness. Septum piercings, traversing the cartilage between the nostrils, commonly utilize 16G (1.2mm) or 14G (1.6mm) jewelry.
Septum jewelry length usually falls between 8mm and 10mm, allowing for a comfortable fit and slight movement. Retainer jewelry, like a horseshoe or captive bead ring, offers discretion. Downsizing may be advised post-healing. Consistent aftercare and professional guidance are crucial for both piercing types.
Nose Piercing Gauge & Length
Nose piercings, a classic form of adornment, require careful consideration of both gauge and length for optimal comfort and aesthetic appeal. The most common gauges for nose piercings are 20G (0.8mm), 22G (0.6mm), and 18G (1.0mm), with 20G being a popular starting point for nostril piercings.
Length varies depending on the placement. Standard nostril piercings typically use studs with lengths ranging from 6.5mm to 8mm. Septril piercings, positioned between the nostrils, generally require lengths between 8mm and 10mm. High nostril piercings may need slightly longer jewelry.

Nose studs and rings come in diverse materials, impacting healing and sensitivity. Initial piercings benefit from hypoallergenic options like surgical steel or titanium. Proper sizing prevents migration and irritation. A reputable piercer will assess your anatomy and recommend the appropriate gauge and length for a seamless experience.
Choosing the Right Jewelry Material
Selecting the appropriate jewelry material is paramount for successful piercing healing and long-term comfort. The material directly impacts potential allergic reactions, irritation, and the overall health of the piercing site. Surgical steel, a common choice, offers affordability but can contain nickel, a known allergen for some.
Titanium is an excellent hypoallergenic option, ideal for sensitive skin and initial piercings. It’s lightweight, biocompatible, and resists corrosion. Gold, specifically 14k or 18k gold (avoiding alloys), is another suitable choice once the piercing is fully healed. However, it’s softer and may scratch more easily.
Avoid materials like nickel silver or plated jewelry during the healing process, as they can cause adverse reactions. The quality of the material influences healing speed and minimizes complications. Consulting with a professional piercer ensures you choose a material best suited to your individual needs and piercing location.
Impact of Material on Healing & Size
The jewelry material significantly influences both the healing process and perceived size of a piercing. Hypoallergenic materials like titanium promote faster, smoother healing by minimizing irritation and allergic reactions, reducing swelling and redness. This allows for a more accurate assessment of the piercing’s true size.
Conversely, lower-quality materials can cause prolonged inflammation, potentially leading to overgrowth of tissue around the jewelry, making the piercing appear larger than it is. Nickel, a common allergen, can trigger significant reactions, hindering healing and potentially requiring removal of the jewelry.
Material density also plays a role. Heavier materials may cause more pressure and discomfort, potentially affecting the piercing’s position and size over time. Choosing biocompatible materials ensures the body accepts the jewelry, fostering optimal healing and maintaining the intended aesthetic.
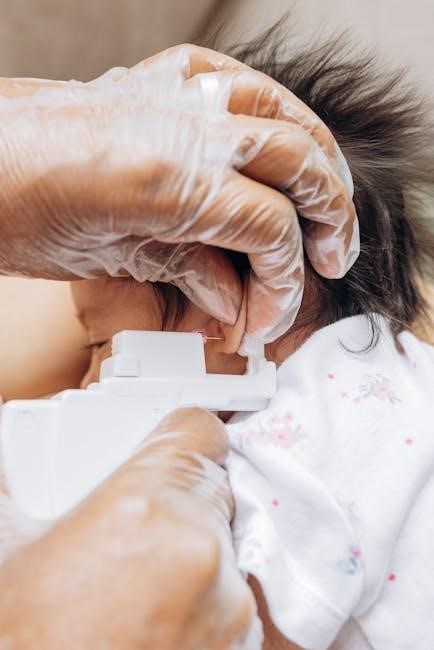
Professional Piercing & Sizing Assistance
Seeking guidance from a reputable piercer is paramount for accurate sizing and a successful piercing experience. Experienced professionals possess the knowledge to assess your anatomy and recommend the appropriate gauge and length for your desired placement, minimizing complications.
They utilize specialized tools to precisely measure and mark the piercing location, ensuring symmetry and aesthetic appeal; A skilled piercer will also discuss your lifestyle and jewelry preferences, offering tailored advice on suitable materials and styles.
Don’t hesitate to ask questions about the procedure, aftercare, and potential risks. A trustworthy piercer prioritizes client safety and provides comprehensive instructions for optimal healing. Self-piercing or relying on untrained individuals can lead to infection, improper placement, and long-term issues.
Professional assistance guarantees a safe, comfortable, and aesthetically pleasing piercing outcome.
The Importance of a Reputable Piercer
Choosing a reputable piercer is arguably the most crucial step in the piercing process. A skilled professional prioritizes hygiene, safety, and anatomical understanding, significantly reducing the risk of complications like infection or improper healing.
Look for studios that maintain a sterile environment, utilizing autoclaves for sterilization and disposable, single-use needles. Observe their practices – are surfaces cleaned regularly? Do they wear gloves throughout the procedure? A legitimate piercer will readily answer your questions and explain their methods.
Check online reviews and ask for recommendations from trusted sources. A reputable piercer will be licensed and adhere to strict health and safety regulations. Avoid studios offering promotional pricing that seems too good to be true, as this may indicate compromised standards.
Investing in a professional piercing ensures a positive experience and a beautifully healed result.
Aftercare & Downsizing for Optimal Healing
Proper aftercare is paramount for successful piercing healing. Following your piercer’s specific instructions diligently minimizes the risk of infection and promotes healthy tissue growth. Generally, this involves cleaning the piercing twice daily with a sterile saline solution, avoiding harsh chemicals, and resisting the urge to touch or rotate the jewelry.
Downsizing jewelry – replacing the initial piercing jewelry with a slightly shorter post – is often recommended once initial swelling subsides. This prevents the piercing from shrinking as it heals and ensures a comfortable fit. This is typically done within 6-8 weeks, but timing varies.
Avoid using over-the-counter antiseptic solutions unless specifically advised by your piercer, as some can hinder healing. Be patient; full healing can take several months, depending on the piercing location. Consistent aftercare and timely downsizing are key to a beautifully healed piercing.
Downsizing to Prevent Shrinkage
A common concern during ear piercing healing is the potential for shrinkage, where the piercing appears to close or become tighter over time. Downsizing jewelry proactively addresses this issue by accommodating the natural settling of the piercing channel. Initially, piercings are often fitted with slightly larger jewelry to allow for swelling.
As swelling decreases, typically after 6-8 weeks, the body may begin to reject the excess space. If the initial jewelry remains in place, the skin can migrate, leading to a tighter fit and potential discomfort. Downsizing involves replacing the original jewelry with a shorter post, maintaining a comfortable and secure fit.
This process prevents the piercing from shrinking back down and ensures the jewelry remains visible and properly positioned. Always consult with your piercer before downsizing to determine the appropriate size and timing for your specific piercing.
Gauge Size Conversion Chart (Metric to Imperial)
Understanding gauge sizes can be tricky, as they operate on a reverse numerical system – a smaller number indicates a larger diameter. This chart provides a clear conversion between metric (millimeters) and imperial (gauge) measurements commonly used in the piercing industry, aiding in accurate jewelry selection and communication with your piercer.
Here’s a quick reference:
- 24 Gauge = 0.6mm
- 22 Gauge = 0.7mm
- 20 Gauge = 0.8mm
- 18 Gauge = 1.0mm
- 16 Gauge = 1.2mm
- 14 Gauge = 1.6mm
- 12 Gauge = 2.0mm
- 10 Gauge = 2.4mm
- 8 Gauge = 3.2mm
- 6 Gauge = 4.0mm
- 4 Gauge = 5.0mm
- 2 Gauge = 6.0mm
- 0 Gauge = 8.0mm
Remember that beyond 0 gauge, sizes are typically measured in inches or millimeters. This chart serves as a helpful tool, but professional piercer guidance is always recommended for precise sizing.