
Honda OBD2A Auto to Manual ECU Conversion: A Comprehensive Plan
Embarking on a Honda automatic-to-manual transmission swap necessitates a crucial ECU conversion, often involving OBD2A ECUs like P75, P28, A02, A03, or A04.
Converting a Honda from automatic to manual transmission is a popular modification, but requires more than just mechanical changes. The factory ECU (Engine Control Unit) is programmed specifically for either an automatic or manual transmission. Simply swapping the transmission without addressing the ECU will result in improper operation and potentially damage.
This guide details the process of ECU conversion, focusing on utilizing OBD2A ECUs. We’ll explore compatibility, necessary hardware like jumper harnesses, and potential issues such as immobilizer systems and sensor differences. Successful conversion demands careful planning and execution to ensure optimal performance and reliability.
Understanding OBD2A and OBD2B Systems
Honda’s OBD2A (1996-2000) and OBD2B (2001-2005) systems differ significantly in ECU connectors and functionality. OBD2B ECUs, often found in later models, incorporate an immobilizer system for security. Swapping to a manual transmission necessitates an ECU programmed for manual operation.
Directly using an OBD2B manual ECU in an older OBD2A chassis isn’t feasible due to connector incompatibility. Therefore, a common solution involves utilizing an OBD2A ECU with a jumper harness to bridge the gap, allowing compatibility while bypassing the immobilizer concerns.
Why ECU Conversion is Necessary
Converting from an automatic to a manual transmission requires an ECU specifically calibrated for manual operation. Automatic ECUs lack the necessary programming to manage a manual clutch and gear selection, resulting in improper engine control and potential damage.
Simply swapping the transmission isn’t enough; the ECU must recognize the manual setup for correct VTEC engagement and overall performance. Utilizing the correct ECU ensures optimal functionality and avoids issues like incorrect sensor readings or transmission incompatibility.
The Core Problem: Automatic vs. Manual ECU Differences
The fundamental difference lies in how the ECU interprets signals. Automatic ECUs anticipate torque converter behavior, while manual ECUs expect clutch engagement. Manual ECUs also omit a connector entirely, having no pins for automatic transmission control.
Furthermore, sensor requirements differ; manual ECUs often need a 5-wire wideband O2 sensor and a 2-wire IACV, contrasting with the 4-wire narrowband O2 and 3-wire IACV found in automatic setups. These discrepancies necessitate a swap or adaptation.
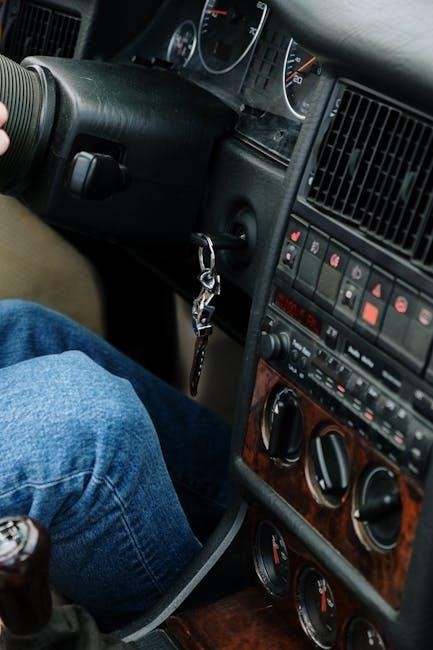
Identifying Your Current ECU

Locating your ECU is the first step. In most Honda vehicles, it’s typically found under the dashboard, on the passenger side, often secured with bolts. Once located, decoding the part number is vital. This number, found on a sticker affixed to the ECU itself, reveals crucial information.
The part number indicates the ECU’s original application – automatic or manual – and its OBD generation (OBD2A or OBD2B). Knowing this dictates the necessary conversion path and compatible replacement options for a successful manual swap.
ECU Location in Honda Vehicles
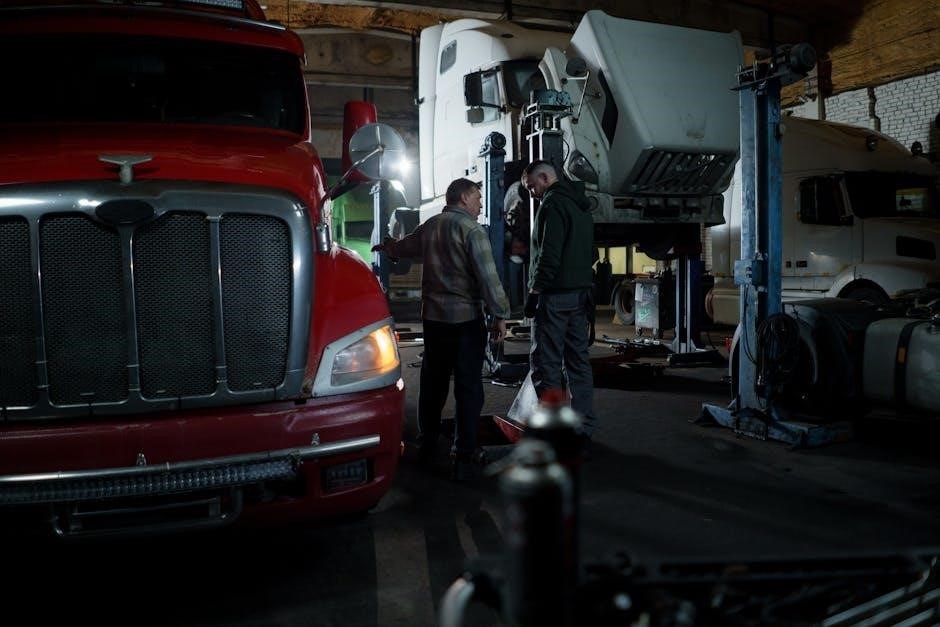
Finding the ECU is paramount before any conversion work begins. Generally, within Honda vehicles, the Engine Control Unit resides inside the cabin, specifically under the dashboard. Look to the passenger side, as this is the most common location. It’s usually secured with 10mm bolts, making access relatively straightforward.
However, slight variations exist depending on the specific Honda model and year. Careful inspection of the passenger footwell area is recommended to pinpoint its exact position.
Decoding the ECU Part Number
Understanding the ECU part number is vital for compatibility. Honda ECU part numbers, like 37820-P75-A02, contain crucial information. The initial digits (37820) identify the ECU itself. “P75” denotes the ECU family, indicating its processor and basic functionality. The final characters, like “A02”, represent the revision or variant.
These revisions often signify minor changes or updates. Knowing this allows you to verify if the ECU is suitable for a manual transmission swap and emissions compliance.
Compatible OBD2A ECUs for Manual Swaps
Several OBD2A ECUs are suitable for manual transmission conversions. P75 ECUs are a popular choice, offering broad compatibility. P28 ECUs present an alternative, though potentially requiring more tuning. A02, A03, and A04 variants of the P75 ECU are frequently used, each with slight differences.
Careful consideration of these variants, alongside a compatible jumper harness, is crucial for a successful swap and proper operation;
P75 ECUs (Popular Choice)
P75 ECUs are widely favored for Honda OBD2A auto-to-manual conversions due to their readily available nature and compatibility with various B-series engines. Originally intended for 1996-1998 Honda Integra LS models, they offer a solid base for manual swaps.
Finding a P75 ECU is generally easier than other options, and they often require less extensive modifications. However, ensure the chosen P75 is not an immobilizer-equipped variant (A55).
P28 ECUs (Alternative Options)
P28 ECUs present a viable alternative for Honda OBD2A auto-to-manual conversions, particularly for those seeking a blank slate for custom tuning. Originally found in 1997-1998 Integra GSR models, they require more initial setup compared to P75s.
P28s often necessitate a full tune to operate correctly with a manual transmission, but offer greater flexibility for performance optimization. Careful consideration of sensor compatibility is crucial when utilizing a P28.
A02, A03, A04 ECU Variants – Detailed Comparison
The A02, A03, and A04 OBD2A P75 ECUs offer potential solutions, often paired with a jumper harness for OBD2B conversions. These variants are generally considered compatible, but subtle differences exist. The A03 is often favored for its readily available VTEC control.
Careful research is vital, as sourcing and verifying the correct variant is key. Compatibility with emissions standards should be confirmed before installation, ensuring legal compliance in your region;
The OBD2B to OBD2A Jumper Harness
A crucial component for OBD2B to OBD2A ECU swaps is the jumper harness. This adapter facilitates communication between the OBD2A ECU and the OBD2B vehicle’s wiring loom. Sourcing a reliable harness is paramount, avoiding potential wiring issues.
Pinout considerations are vital; ensure correct connections for proper functionality. Thoroughly review wiring diagrams before installation. A well-made harness simplifies the conversion, minimizing complications and ensuring a smooth transition.
Purpose of the Jumper Harness
The OBD2B to OBD2A jumper harness bridges the compatibility gap between older and newer Honda ECUs and vehicle wiring. OBD2B vehicles possess an extra connector absent in OBD2A systems. The harness effectively reroutes signals, allowing the OBD2A ECU to function correctly within the OBD2B chassis.
It bypasses the unused connector, ensuring all necessary functions – like sensor readings and actuator control – operate seamlessly. Without it, the ECU won’t communicate properly with the car’s systems.
Sourcing a Reliable Jumper Harness
Obtaining a high-quality jumper harness is paramount for a successful conversion. Numerous vendors specialize in these harnesses, offering both pre-made options and custom builds. Prioritize reputable sellers with positive feedback and a history of accurate wiring.
Avoid excessively cheap harnesses, as they may utilize substandard wiring or incorrect pinouts. Thoroughly inspect the harness upon arrival, verifying all connections are secure and the wiring gauge is appropriate for the application.
Wiring Diagram and Pinout Considerations
Meticulous attention to wiring diagrams and pinouts is critical during jumper harness installation. The OBD2B chassis and OBD2A ECU require precise connection mapping. Incorrect wiring can lead to engine malfunctions, sensor errors, or even ECU damage.
Carefully compare the pinouts of your original OBD2B ECU with the OBD2A ECU and the jumper harness documentation. Double-check each connection before securing it, ensuring proper signal transmission. Resources like Honda-Tech forums often provide detailed wiring schematics.
Immobilizer Issues and Solutions
OBD2B ECUs often incorporate immobilizer systems, presenting a challenge during swaps. Utilizing an OBD2A ECU without an immobilizer, like many P75 variants, is a common solution. Attempting to convert an automatic ECU to manual is not feasible. Selecting an ECU originally intended for a manual transmission avoids these complexities.
If an OBD2B ECU must be retained, advanced (and risky) bypass or deletion procedures exist, but are not recommended for beginners. Careful ECU selection is the most straightforward approach to sidestep immobilizer problems.
Immobilizer Systems in OBD2B ECUs
OBD2B ECUs, particularly those from 2000 and later Honda Integras, frequently feature integrated immobilizer systems. These systems pair the ECU with the vehicle’s key, preventing the engine from starting without the correct key’s transponder signal. This security feature complicates manual transmission swaps, as the original automatic ECU’s immobilizer may not function correctly with the new manual setup.
The immobilizer’s presence means a simple ECU swap isn’t always possible; it requires careful consideration and often necessitates alternative ECU choices.
Avoiding Immobilizer Problems with ECU Selection
To sidestep immobilizer issues during your Honda ECU conversion, prioritize selecting an OBD2A ECU without a factory-installed immobilizer. P75, P28, A02, A03, and A04 variants from earlier OBD2A vehicles generally lack this security feature, simplifying the swap process. Carefully research the specific ECU part number before purchase.
Choosing an immobilizer-free ECU eliminates the need for complex bypass procedures, ensuring a smoother and more straightforward conversion experience.
Immobilizer Bypass/Deletion (Advanced – Proceed with Caution)
Bypassing or deleting the immobilizer in an OBD2B ECU is an advanced procedure demanding significant technical expertise. Incorrect implementation can render your vehicle inoperable or create security vulnerabilities. This often involves ECU reprogramming or utilizing aftermarket solutions.
Proceed with extreme caution, understanding the risks involved. Improperly executed bypasses may trigger persistent error codes or compromise vehicle security. Professional assistance is strongly recommended for this complex modification.
Sensor Compatibility: O2 Sensors and IACV
Successful ECU conversion hinges on sensor compatibility. Manual ECUs often require a 5-wire wideband O2 sensor, differing from the 4-wire narrowband O2 sensor found in automatic setups. Similarly, IACV (Idle Air Control Valve) differences exist; manual ECUs typically use a 2-wire IACV, while automatics employ a 3 or 4-wire version.
Adapting sensors is crucial. Utilizing the incorrect sensor can lead to poor engine performance and diagnostic trouble codes. Careful consideration and potential sensor replacement are vital for a smooth conversion.
Narrowband vs. Wideband O2 Sensors
Understanding oxygen sensors is key to a successful swap. Narrowband O2 sensors, common in older OBD2 systems, provide limited air/fuel ratio information. Conversely, wideband sensors offer a much more precise and broader range of readings, crucial for optimal tuning with a manual transmission and ECU.
Manual ECU conversions often necessitate a switch to a wideband O2 sensor to fully leverage the ECU’s capabilities and ensure accurate fuel delivery, improving performance and emissions control.
2-Wire vs. 3/4-Wire IACV Differences
The Idle Air Control Valve (IACV) presents compatibility challenges during an auto-to-manual conversion. Automatic ECUs typically utilize a 3 or 4-wire IACV, while manual ECUs often require a 2-wire version. This difference stems from how the ECU controls idle speed.
Adapting the IACV is vital. Simply connecting the wrong type can lead to idling issues. Conversion often involves swapping the IACV or utilizing an adapter harness to ensure proper functionality with the new ECU.
Adapting Sensors for Compatibility
Sensor compatibility is paramount during an ECU conversion. Specifically, oxygen (O2) sensors and the Idle Air Control Valve (IACV) require careful consideration. Automatic ECUs often expect narrowband O2 sensors and 3/4-wire IACVs, while manual setups frequently need 2-wire IACVs.
Adaptation strategies include sensor swaps or utilizing adapter harnesses. Ensuring the ECU receives the correct signal is crucial for proper engine operation and emissions compliance. Careful wiring and component selection are key.
Emissions Testing and Compliance
Post-conversion emissions are a significant concern. Altering the ECU and potentially sensor configurations can impact a vehicle’s ability to pass emissions tests. It’s vital to research local regulations and ensure compliance before and after the swap.
A pre-conversion emissions check establishes a baseline. Potential issues include altered fuel trims or incorrect sensor readings. Addressing these proactively, potentially through dyno tuning, is crucial for maintaining legality and avoiding fines.
Potential Emissions Issues After Conversion
The ECU swap can introduce several emissions-related problems. Altered fuel maps, incompatible oxygen sensor types (narrowband vs. wideband), and incorrect IACV wiring are common culprits. These changes can lead to higher hydrocarbon (HC) or carbon monoxide (CO) readings during testing.
Incorrect sensor data throws off the ECU’s calculations. Ensuring proper sensor adaptation and potentially requiring a dyno tune to optimize the air-fuel ratio are essential steps to mitigate these issues and pass inspection.
Ensuring Emissions Legality in Your Region

Emissions regulations vary significantly by location. Before commencing the conversion, thoroughly research your local and state laws regarding modified vehicles and emissions testing requirements. Some regions may require a visual inspection, while others demand specific OBDII readiness codes.
A pre-conversion emissions check is vital. Document your vehicle’s baseline readings to demonstrate compliance before modifications. Be prepared to address any discrepancies post-swap, potentially involving professional tuning or component adjustments to meet legal standards.
Pre-Conversion Emissions Check
Establishing a baseline is paramount for emissions legality. Before initiating the ECU conversion, conduct a comprehensive emissions test. Record all relevant data, including O2 sensor readings, IACV functionality, and any existing check engine light codes. This documentation serves as proof of your vehicle’s original compliance.
Retain these records meticulously. They will be invaluable when comparing post-conversion results and demonstrating that any changes haven’t compromised emissions standards in your region.
Required Tools and Materials
Successful conversion demands specific tools. You’ll need a socket set, screwdrivers, wire strippers, a multimeter, and potentially a soldering iron. Essential materials include the chosen OBD2A ECU (P75, P28, etc.), an OBD2B to OBD2A jumper harness, and diagnostic tools for code reading.
Consider acquiring a data logging device for post-conversion monitoring. Secure a reliable wiring diagram and ensure you have access to forums like Honda-Tech for guidance throughout the process.
Step-by-Step Conversion Process Overview
Begin by disconnecting the battery and locating the original ECU. Carefully remove the automatic ECU and install the OBD2A ECU, utilizing the jumper harness to bridge the OBD2B connector. Double-check all connections, referencing wiring diagrams.
Next, address the immobilizer if present, potentially requiring bypass or deletion. Finally, reconnect the battery and verify ECU functionality using a diagnostic tool. Monitor for any check engine lights and prepare for potential tuning.
Common Problems and Troubleshooting
ECU failing to recognize the manual transmission is frequent; verify wiring and ECU compatibility. Persistent check engine lights often indicate sensor issues – O2 sensors or IACV discrepancies are common. VTEC engagement problems may stem from incorrect tuning or wiring errors.
Consult Honda-Tech forums and Nick Sabella’s videos for solutions. Data logging is crucial for diagnosis. Ensure proper sensor adaptation and consider professional tuning if issues persist.
ECU Not Recognizing the Manual Transmission
This issue typically arises from incorrect wiring or an incompatible ECU. Double-check the jumper harness connections, ensuring all pins are correctly matched between the OBD2B chassis and the OBD2A ECU. Verify the ECU is specifically programmed for a manual transmission; auto ECUs won’t recognize manual input.
Inspect the transmission speed sensor wiring. Consult Honda-Tech forums for specific wiring diagrams. A faulty sensor or incorrect signal can prevent recognition. Proper ECU selection is paramount for successful operation.
Check Engine Lights After Conversion
Post-conversion Check Engine Lights (CELs) are common, often stemming from sensor incompatibility or incorrect wiring. Address O2 sensor and IACV differences immediately – narrowband vs. wideband, 2-wire vs. 3/4-wire. Data logging is crucial to pinpoint the Diagnostic Trouble Codes (DTCs).
Review connections meticulously. Honda-Tech forums and Reddit communities (r/Integra, r/ProjectHondas) offer valuable troubleshooting advice. A dyno tune can resolve lingering CELs and optimize performance.
Issues with VTEC Engagement
VTEC disengagement or erratic behavior post-swap can occur due to incorrect ECU calibration or sensor miscommunication. Ensure the ECU is properly tuned for a manual transmission, as automatic ECUs have different VTEC engagement points. Check the VTEC solenoid and pressure switch for functionality.
Consult Nick Sabella’s videos and Honda-Tech forums for specific troubleshooting steps. Data logging is essential to monitor VTEC activation parameters. A dyno tune is often necessary to optimize VTEC engagement.
Resources and Helpful Forums
Numerous online communities offer invaluable support for your ECU conversion. Honda-Tech Forums provide extensive threads and experienced members. Reddit communities like r/Integra, r/ProjectHondas, and r/Honda are active hubs for discussion and troubleshooting.
Nick Sabella’s videos are highly recommended for visual guidance throughout the process. These resources offer solutions to common problems and insights from those who’ve completed similar swaps, ensuring a smoother conversion.
Honda-Tech Forums
Honda-Tech Forums are a cornerstone resource for OBD2A auto-to-manual conversions. Extensive threads detail experiences, troubleshooting, and ECU compatibility. Users frequently discuss jumper harness wiring, immobilizer issues, and sensor adaptation.
The forum’s search function is invaluable, uncovering solutions to previously addressed problems. Experienced members readily offer guidance, making it a prime location for asking specific questions and receiving detailed answers regarding your conversion project.
Reddit Communities (r/Integra, r/ProjectHondas, r/Honda)
Reddit’s r/Integra, r/ProjectHondas, and r/Honda offer vibrant communities for auto-to-manual swap discussions. Users share experiences with ECU choices – P75, A02, A03, A04 – and jumper harness compatibility. Recent posts address emissions testing and potential issues post-conversion.
These subreddits are excellent for quick questions and accessing diverse perspectives. Many recommend Nick Sabella’s videos and Texashonda’s guides, frequently referenced for detailed swap instructions and troubleshooting tips.
Nick Sabella’s Videos
Nick Sabella’s YouTube channel is a cornerstone resource for Honda auto-to-manual conversions, providing comprehensive visual guides. His videos detail ECU selection – P75, P28, and OBD2A variants – and the crucial OBD2B to OBD2A jumper harness installation process.
Sabella’s content clarifies immobilizer concerns and sensor compatibility issues, like O2 sensors and IACVs. Many Reddit users (r/Integra, r/ProjectHondas) consistently recommend his tutorials as essential viewing before and during the swap, simplifying complex procedures.
Cost Breakdown of the Conversion
The financial aspect of an auto-to-manual ECU conversion varies significantly. A compatible OBD2A ECU (P75, P28, A-series) typically ranges from $150 to $400, depending on condition and source. A quality OBD2B to OBD2A jumper harness adds $80 to $150.
Potential costs include professional tuning ($300-$600) and addressing immobilizer issues, if encountered. Factor in tools and materials, potentially adding another $100-$200. Total costs generally fall between $530 and $1350, excluding labor if outsourced.
Alternatives to ECU Conversion
While ECU conversion is common, alternative approaches exist, though with limitations. Some explore custom chipping or reprogramming of the original OBD2B ECU, a complex and risky endeavor. This requires specialized knowledge and equipment, often exceeding the cost of a swap.
Another option is sourcing a factory manual transmission ECU, but finding a compatible, non-immobilizer unit can be challenging. Ultimately, a dedicated OBD2A ECU with a jumper harness offers the most reliable and straightforward solution for a successful conversion.
Long-Term Maintenance Considerations
Post-conversion, regular ECU monitoring via data logging is vital. Pay close attention to sensor readings, particularly the O2 sensor and IACV, ensuring compatibility and proper function. Periodic checks for Check Engine Lights are crucial, addressing any codes promptly.
Consider a dyno tune to optimize performance and fuel efficiency. Long-term, be mindful of potential emissions issues and maintain a proactive approach to vehicle upkeep for continued reliability.
Dyno Tuning After ECU Conversion
Following the ECU conversion, a professional dyno tune is highly recommended. This optimizes the air/fuel ratio, ignition timing, and VTEC engagement point for the manual transmission. A skilled tuner can maximize horsepower and torque gains, ensuring smooth operation.
Dyno tuning also addresses potential issues revealed during data logging, refining the ECU map for peak performance and reliability. It’s an investment in long-term engine health and driving enjoyment.
Data Logging and ECU Monitoring

Post-conversion, diligent data logging is essential for verifying optimal ECU operation. Utilize OBD2 scanners to monitor parameters like O2 sensor readings, ignition timing, and fuel trims. This identifies potential issues and informs tuning adjustments.
Real-time ECU monitoring reveals how the engine responds to driving conditions, allowing for precise refinement. Analyzing logged data ensures the ECU map is functioning correctly, maximizing performance and preventing damage.
Legal Considerations and Vehicle Registration
Modifying a vehicle’s drivetrain, like an auto-to-manual swap, can have legal ramifications. Check your local and state regulations regarding emissions compliance and vehicle modifications. Some jurisdictions require inspections to verify adherence to standards.
Ensure the vehicle registration accurately reflects the changes; failing to do so could lead to legal issues. Document all modifications and retain records of ECU changes. Prior research prevents potential fines or registration complications.
Safety Precautions During the Swap
Disconnect the negative battery terminal before commencing any electrical work. Handle wiring with care, avoiding shorts or damage. Properly support the vehicle using jack stands – never rely solely on a jack.
Be mindful of fuel lines and brake lines during the process. Wear safety glasses to protect your eyes. If unfamiliar with automotive electrical systems, seek assistance from a qualified professional. Prioritize safety to prevent injury or vehicle damage.
Frequently Asked Questions (FAQ)
Q: Can an OBD2 auto ECU be converted to manual? A: No, a proper manual ECU is required. Q: What about immobilizer issues? A: Select an ECU without one or consider bypass/deletion (advanced).
Q: Will this pass emissions? A: Potentially, but pre-conversion checks and regional legality are vital. Q: Where can I find help? A: Honda-Tech forums, Reddit communities (r/Integra, r/ProjectHondas), and Nick Sabella’s videos are excellent resources.
Is the Conversion Right for You?
Converting to a manual transmission and ECU requires dedication and research. It’s not simply plug-and-play; potential issues like sensor compatibility and emissions compliance demand attention.
Consider your mechanical skills, budget, and local regulations. If you’re comfortable with wiring, troubleshooting, and potentially dyno tuning, it’s a rewarding upgrade. Otherwise, professional assistance might be prudent. Weigh the benefits against the complexities before committing to this project.